Day Seven- Suzanne’s Table Twelve Days of Cookies: Sugar and Spice

Tags

,

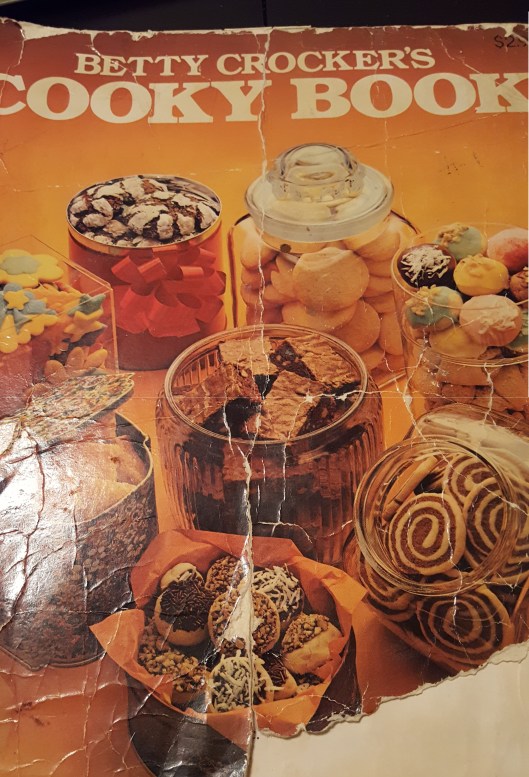
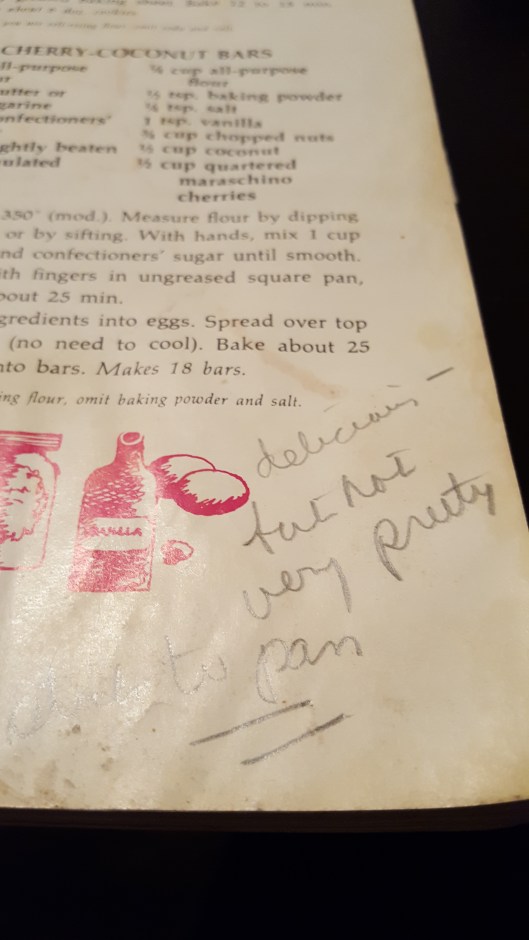
On the inside cover of my grandmother’s cookie book, the page number for sugar and spice cookies was written down and there was a star next to it.  This same recipe made it into Suzanne’s Table cookbook. Growing up, the smell of fresh baked cookies wafted through our home on a daily basis, not just during the holidays.  If someone were to ask me to use words to describe cookies baking in the oven, my words would be home, family, and grandma.

Back in my single girl days living in Chicago, I rarely ventured into the kitchen to actually turn on my oven, but once in a while I would dust off my cookie sheets, and make a batch of something. Like her rolling pin, I also brought my granma’s cookie sheets when I moved to my first apartment. It has been 21 years since I started using them and I still use them today.  I have tried newer ones, but I just don’t get the same even results, I am convinced that some of her magic is infused into her cookies sheets and that is why I get the consistent results I do, or it could be that my skills have just improved over the years.

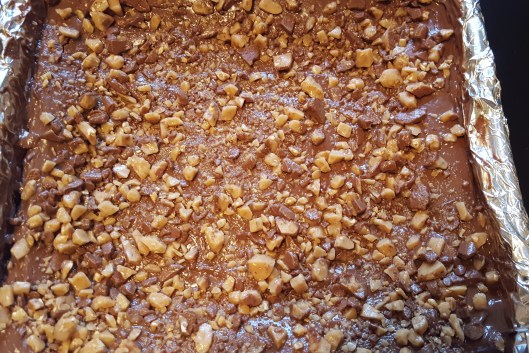
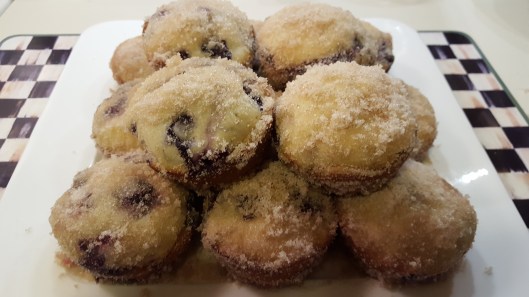
The cookie is basically a classic molasses cookie, with a fancier name. It is crunchy when you bite into it and soft on the inside.  I love the smell of cinnamon, cloves, and ginger as it is baking in the oven.  Looking outside at the snow covered trees and the expectation of more snow coming today, the smell of these cookies baking make me feel all warm and cozy.

20161217_133321


Sugar and Spice Cookies

Preheat oven to 375

1 cup brown sugar

1 egg

¾ cup shortening

¼ cup dark molasses

2 ¼ cup all-purpose flour

½ tsp salt

¾ tsp ground cloves

2 tsp baking soda

1 tsp cinnamon

¾ tsp ground ginger

¼ cup granulated sugar for dipping

In mixing bowl, combine the first 4 ingredients, mix until well combined then add in the remaining dry ingredients except for the granulated sugar.  Place bowl in the refrigerator to chill the dough.  I usually only wait about 15-20 minutes.  Roll cookies into balls about 1 ½ inch size and dip the top in the granulated sugar.

20161217_125104

Place sugar side up on greased cookie sheet (you can also line your sheet with parchment paper instead of greasing.) Bake for about 12 minutes.  Makes about 3 ½ dozen cookies.

Day Six- Suzanne’s Table Twelve Days of Cookies- Orange Drops

Tags

, ,

Today I present Orange Drops.  My paternal grandmother was a southern woman,  born there and lived her entire life in the South.  She lived most of her life in Memphis, TN and eventually retired to Sarasota, FL. Every year she would send my dad a giant box of oranges shortly before Christmas.  My dad being a southern boy would spend hours working on those oranges to make a giant bowl of ambrosia salad.  It was his contribution to our Christmas dinner every year.  My Grandmother Effie would grab a bunch of those oranges and make her orange drop cookies.  They were one of my mom’s favorites.

As I have been making these family recipes, vivid images and memories have been floating in and out of my mind.  For example, talking about my dad’s ambrosia salad I can pictures the crystal bowls my mom pulled out every year for this one purpose.  The orange drops bring back memories of my mom and grandmother sitting down for a cup of tea to enjoy the first batch fresh of out of the oven.

Orange Drops

20161216_162833

Preheat oven to 400 degrees

Makes about 3 dozen

Cookie:

3/4 cup granulated sugar

2 tbsp grated orange peel

1 egg

1/2 tsp baking powder

1/2 tsp baking soda

1/2 tsp salt

2 cups all-purpose flour

1/2 cup orange juice

2/3 cup shortening

Mix all the dry ingredients together in small bowl and set aside. Mix sugar, shortening, orange peel, orange juice and egg together in large bowl. Slowly add in dry ingredients. Drop by rounded teaspoonfuls about 2 inches apart on un-greased baking sheet. Bake 8-9 minutes until edges are golden and cool.

While cookies are cooling, make the frosting.

Frosting:

2 cups confectioners sugar

1 tbsp grated orange peel

2 tbsp butter

2 tbsp orange juice

Mix all ingredients together until well combined and of spreading consistency.  If your mixture is still stiff add an additional tablespoon of orange juice. Spread over cooled cookies.


20161216_163132

I suggest leaving them on a cooling rack as the frosting hardens slightly, as you can see it can get a little messy


Day Five- Suzanne’s Table Twelve Days of Cookies: Double Chocolate Mint Bars

Tags

, ,

For day five I am sharing my grandmother’s recipe for Double Chocolate Mint Bars.  To me, chocolate and mint are the perfect pairings.  Of course, that may have something to do with the fact that mint chocolate chip ice cream is my all-time favorite. However, I am a big fan of anything chocolate mint. This is a 3 layer cookie bar, the bottom layer is soft like cake, it has a green mint buttercream filling, followed by a melted chocolate top. If you aren’t a fan of green you can use any color food coloring you would like, or just use the golden butter cream as is.

This recipe is broken down into 3 parts, there is a baked chocolate layer, the festive buttercream layer and then the melted chocolate topping over the top.  It is a little time consuming because you have to chill the pan between each layer but I promise it is worth the wait.

Double Chocolate Mint Bars

Batter:

1 cup all-purpose flour

½ cup butter

16 ounces of chocolate syrup

1 cup sugar

4 eggs

In large bowl beat flour, sugar, butter, eggs and syrup until smooth.  Pour into prepared pan. Bake for 25-30 minutes, or until the top springs back when lightly touched. The top may still appear wet. Cool completely in pan before adding the mint cream layer.


20161215_205402

The spongy batter fresh out of the oven


Mint Cream layer:

2 cups confectioners sugar

½ cup butter

½ tsp mint extract or 4 drops of peppermint oil

1 tbsp water

Green food coloring (or whatever color you desire)

Combine all ingredients in small bowl and beat until smooth. Once batter layer is cool, spread over the top and chill again.

20161215_205700

Chocolate Topping:

6 tbsp  butter

1 cup mint or semi-sweet chocolate chips

Using double boiler melt butter and chocolate until mixture is smooth when stirred.  As an alternative to a double boiler, you can place in bowl and microwave on high in 1 ½ minute increments until melted and smooth.  Pour over the chilled pan and cut into small pieces and chill until ready to serve.

three


Day Four- Suzanne’s Table Twelve Days of Cookies: Brownies with Nutella Topping

Tags

, , ,

Today I want to share with you one of my new favorites, Brownies with a Nutella topping.  I recently found this recipe and like I do with so many, I make slight changes to suit my tastes.

This brownie is not only rich and chocolaty but also slightly gooey.  I suggest keeping it in the pan until ready to serve as opposed to placing it on a cookie tray.  I always eat them with a fork.  I was asked to make something sweet for Thanksgiving this year, and rather than opting for the traditional pumpkin, pecan or apple pie, I thought chocolate would be a good route to take, and I was right, they were very well received.

20161124_135411

Brownies with Nutella Topping

Preheat oven to 350 degrees F. Line a 9 x 9″ baking pan with foil and lightly spray with nonstick cooking spray.

1 cup butter

2 cups granulated sugar

4 eggs

2 teaspoons vanilla extract

2/3 cup unsweetened cocoa powder

1 cup all-purpose flour

1/2 teaspoon salt

1/2 teaspoon baking powder

Topping:

1/2 cup Nutella

1 cup toffee bits (I buy the already chopped heath bar bits, you can find them in the aisle with chocolate chips)

To start, melt butter in a medium saucepan over low heat. Stir in sugar and remove from heat. Cool for 5 minutes.

While butter is melting, in small bowl mix together the dry ingredients and set aside

In large mixing bowl, place the sugar, once the butter is melted pour over the top of the sugar, allow butter-sugar mixture to cool for a few minutes.  Next, add eggs, one at a time, whisking until combined, then add vanilla extract. Once that is thoroughly mixed add the dry ingredients, add in small increments making sure the dry mixture is thoroughly mixed in.  The consistency should be shiny and there should be no flour streaks remaining. Pour into prepared baking pan. Bake for 28-33 minutes, bake for less time if you want a gooey brownie.

Remove from oven when done baking and while still warm evenly spread the Nutella over the brownies, follow by sprinkling the toffee chips over the top. Let cool completely before cutting and serving.  However, I rarely can wait that long and my first brownie is usually a clumpy mess of gooey chocolate yumminess.


Day Three- Suzanne’s Table Twelve Days of Cookies: Swedish Coconut Cookies

Tags

, ,

Today I present to you Swedish Coconut Cookies.  They have the texture of shortbread, they are buttery and delicious.  Since they are a drier cookie, as opposed to chewy, they can be made in advance and still be tasty when you are ready to serve them even if it is a few days later.

My mom was quite proud of this recipe, in fact, she won a blue ribbon at the Michigan State Fair in the cookie category with this cookie.

She had this plaque done in decoupage and it hung in our kitchen.

33770

To make cookies, I start with toasting the coconut. To toast the coconut, preheat oven to 325 and spread coconut in cookie pan in an even layer

20161212_174954

Toast in oven for about 10 minutes, halfway through the process I stir the coconut around to make sure it toasts evenly.  When done, let it cool slightly before mixing into cookie batter.

20161212_180546

While the coconut is toasting, I like to start the batter. I begin with the butter, shortening and sugar, mix it well until it is creamy. Then add the remaining dry ingredients.

For the dough in the shape of balls and flatten slightly

20161212_182556

Once baked I let cool for only a minute and transfer to cooling rack

20161212_202704


Swedish Coconut Cookies

Preheat oven to 350 degrees

2 cups white sugar

1 cup shortening

1 cup butter

1 cup toasted coconut

3 cups flour

1 tsp baking soda

1 tsp baking powder

¾ tsp salt

Cream together butter, shortening, and sugar. Stir in flour, baking powder and soda, salt and toasted coconut.  Roll into balls about the size of a hickory nut. Place on ungreased cookie sheet and flatten slightly.  Bake for 28-30 minutes. Makes about 8 dozen.

Day Two- Suzanne’s Table Twelve Days of Cookies: Chocolate Fudge

Tags

My original plan was twelve days of cookies, but when I think back to the memories of Christmas’s past, my grandmother’s cookies trays were filled with not only baked goodies but also pieces of my mom’s chocolate and peanut butter fudge.  I will be sharing the peanut butter recipe in a few days.

There are many versions of chocolate fudge out there, I have tried a few, but my favorite is mom’s, I have the most success with her recipe. In her cookbook, it is called Chocolate Fudge-Mamie Eisenhower.  However after a google search, examining many of the Mamie Eisenhower fudge recipes available, mom’s has a few variations from the others. The biggest difference, the recipe I have uses only one type of chocolate instead of two like the other versions call for.

One of the favorite things about my mom’s cookbook are the special footnotes she had placed by some of the recipes.  It brings back memories of  family dinners and holiday’s past.  As I was making this batch, I could see it so clearly, like it was yesterday, my mom and dad standing side by side, working together in the kitchen.  While making this recent batch I learned the reason why my dad was probably there to assist her. As I was getting ready to transfer my hot fudge into the pan to cool, it was quite heavy and I had to call my husband to help me. For some reason, this simple process made me feel closer to my parents.

moms-quote

Now to make the Chocolate Fudge…..

Before I start cooking, I prepare my cooling pan by greasing a pan with butter.

20161207_154442

Next combine sugar, butter, and milk in a large saucepan.  Cooking over moderate heat, bring it to a boil and let boil stirring constantly for 7 minutes

20161207_161344


Remove from heat, add in remaining ingredient until all mixed and dissolved

20161207_161810

Pour into your buttered pan and chill until firm

20161207_162312


20161210_222445


Chocolate Fudge-Mamie Eisenhower

Makes about 5 pounds

4 ½ cups white sugar

1 can evaporated milk

1-pint marshmallow fluff

½ lb butter or margarine

18 ounces semi-sweet chocolate chips

2 cups chopped walnuts (optional)

Combine sugar, milk, and butter in a saucepan.  Cook over moderate heat, stirring constantly. Once mixture comes to a boil, let it boil for 7 minutes.  Remove from heat and immediately add chocolate chips and marshmallow fluff and nuts.  Stir mixture until fluff dissolves.  Pour into buttered pan and chill until firm

Day One- Suzanne’s Table Twelve Days of Cookies: Milk Chocolate Toffee Squares

Tags

Today I bring to you one of my all-time favorites, Milk Chocolate Toffee Squares.  If I let myself,  I would eat the entire pan in one sitting. The cookie has a shortbread consistency, it is rich and buttery, then it is smothered  with melted milk chocolate, making it amazing.  They aren’t fancy or a decorative cookie, but they taste delicious. You can also sprinkle chopped nuts over the top, but I have been sending my creations to friends and family and I worry about nut allergies.

This one is simple, you start by creaming together butter, brown sugar, an egg yolk and vanilla.  Then add the flour and salt.

Once you mix all the ingredients together, form it into a ball and place on baking sheet.

20161207_150049

Working from the center out, use the palm of your hand to create a rectangle, then place in oven and bake.

20161207_150225


20161207_151106

Don’t worry about the indentations, the chocolate covers them!


As soon as you remove from oven, pour chocolate pieces over the top and spread around until melted.

20161207_153600


20161207_153850

Allow them to cool for about 10 minutes and then cut into squares, it can be quite messy, as the chocolate is still warm.

toffe-bars-1

Toffee Squares

1 cup butter or margarine

1 cup brown sugar, firmly packed

1 egg yolk

1 tsp vanilla

2 cups all-purpose flour

¼ tsp salt

16 ounces of milk chocolate chips

½ cup chopped nuts (optional)

Heat oven to 350 degrees

Mix butter, sugar, egg yolk, and vanilla. Gradually add flour and salt, mix until dough is well blended.  Spread on baking sheet, leaving about 1 inch all around edges.  Rectangle should measure approximately 13” x 10” Bake 20-25 minutes until nicely brown, remove from oven and pour chocolate chips over the top, let stand for about a minute, until soft and spread evenly over entire surface, sprinkle with nuts if you choose to use them.  Let cool for about 5 minutes and cut into squares while still warm. The recipe makes about 36 squares.

Aunt Effie the Cookie Lady

We moved into the house I grew up in on my 7th birthday. My maternal grandmother just retired from working at Michigan State University, where she had worked as an accountant. My parents built her an apartment into our home and it was in that kitchen that my grandmother Effie started a cookie business. She was known as Aunt Effie the Cookie Lady. People could buy a monthly subscription, in return, they would receive 2 dozen cookies per month. I don’t think my grandmother saw herself as starting a cookie empire like Mrs. Fields, she just loved to bake and my sister and I were her official taste testers. In addition to the cookie business, over the holidays, she would bake 100’s of cookies every year for our family and friends.

I was my grandmother’s shadow, it’s because of her that I love to bake. When I make chocolate crinkles or butterscotch toffee squares I am carried back to her kitchen impatiently standing next to the oven waiting for a hot fresh cookie. When I moved into my first apartment, I brought her rolling pin with me hoping her baking magic would guide me as I rolled out my pastry dough.

Obviously, she didn’t have the convenience of the internet to look up a recipe, besides the rolling pin, another thing I brought with me is her “go-to” cookie book. I love looking through it, there are notes such as “add this” or “skip that” and “my favorites” or “don’t make, horrible, why did they even publish this one.” Many of those favorites made their way into my mom’s cookbook.

aunt-effie-1

As you can see this book was put to good use, a good investment for only $2.95

aunt-effie-3

I guess she was concerned about making pretty cookies

I love the pages with comments

20161204_173325-1

One of my favorites!

In addition to cookies, she made bread, rolls, coffeecake, you name it, and she baked it. As the holiday’s approach, I think about not just her cookies, but her tarts as well. I would pay millions to have just one more of her mincemeat tarts. Over the next few weeks, I will be posting some of those family favorite cookies that made it into the cookbook, as well as a few of my favorites I have found over the past few years. My version of Suzanne’s Table’s 12 days of cookies, hopefully, you might get some ideas for your holiday baking.

Blueberry Muffin Cakes

Tags


I should clarify something, as I said in my previous post, I wasn’t always a fan of cooking but I have always loved to bake.  As I was getting ready to start Suzanne’s Table, I started thumbing through my copy of my mom’s cookbook.  It did not come as a surprise to see the pages with cookies, pies and other baked goods were the ones with remnants of spilled ingredients stuck to them.

My mom didn’t bake often, she left that to my grandmother, who you will learn about later, but when she did bake one of my favorite things she made were her blueberry muffin cakes.  The muffin itself is tasty, but what makes them so fabulous is you roll them in melted butter and cinnamon sugar as soon as they come out of the oven.  My favorite way to eat them is fresh out of the oven, but my husband disagrees with me. He swears they are better the next day. Hopefully you will try to make them and let me know which way you think is better.

blueberry-muffin-cakes-5

Blueberry Muffin Cakes

Makes 18 muffins

½ cup                Vegetable shortening

2                           Eggs

2 ½ tsp              Baking powder

½ tsp                 Nutmeg

2 cups                 Fresh Blueberries

¾ cups              Granulated sugar

2 1/3 cups          UN-sifted all-purpose flour

½ tsp                 Salt

¾ cup                Milk

To roll the muffins after baking

¾ cup                Granulated sugar

¼ tsp                 Ground cinnamon

½ cup                Melted butter

Preheat oven to 350 degrees

In small bowl, mix together all of the dry ingredients and set aside

In large bowl, cream shortening until light and fluffy. Gradually beat in sugar, once combined, beat in eggs.  Alternatively add the dry ingredients and milk to egg mixture, beginning and ending with dry ingredients.  Fold in berries (I like using them slightly frozen to keep them from splitting open during the folding process.) Spoon batter into greased muffin cups, filling to ¾ full.  Bake for 20-25 minutes.  While the muffins are baking, melt butter, and mix remaining sugar and cinnamon together in small bowl. Remove cakes from oven and cool slightly, remove from pan and roll muffins in melted butter, then in cinnamon sugar mixture.

Who is Kristi?


Hi everyone,

Welcome to Suzanne’s Table. My name is Kristi.

Seven years ago, I was a single woman living in downtown Chicago. I had a rich and full life, working in the special events, weddings, corporate dinners and so on. One night I went to a party that I didn’t want to go to, but it changed my life. I am now married to my wonderful husband Brian and I am step-mom to ten year old Kelly and now live in the suburbs of Chicago.

As my environment has changed so have my interests, I still love finding new restaurants and trying different cuisines, but now I love to cook and experiment in the kitchen. When I first started cooking, I found reading blogs about what other amateur cooks had discovered to be quite helpful.

I have learned a lot over the past few years and I love talking about what I am creating in the kitchen. Hopefully you will share with me your favorites as well.


Best,

Kristi

2014-10-12 00.59.10